


You just know dogs are having the time of their life right now—so much attention from the humans! They’re not sure what’s going on, but they are sure a midday belly rub and fetch are suddenly on the table. Another thing getting more attention these days: Your nails. You’ve been keeping them so clean. You’ve been moisturizing every night. You look at them constantly—while you type, cook, toggle the remote between channels during commercial breaks... This whole situation is giving your nails quite the air of glamour, if I may speak on their behalf. Make them feel even more special by taking on that manicure idea you’ve been thinking about but haven’t yet executed. From a rainbow manicure to some minimal nail art, it’s all about staying home but getting out of your comfort zone. Plus, it’s fun! And you’ll get to enjoy it longer than a DIY sourdough loaf. Some suggestions on where to start...
Skittles Nails
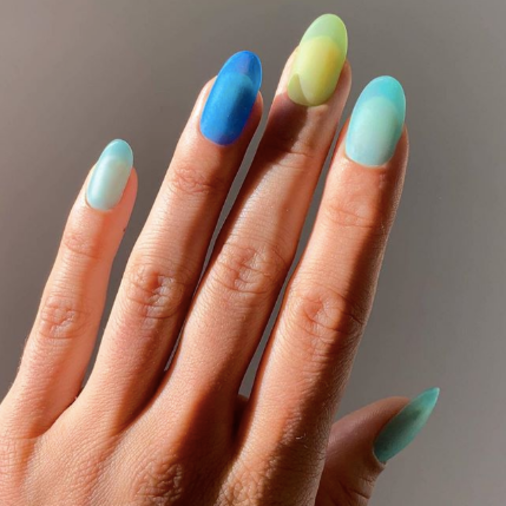
Photo courtesy @jessicawashick
Right about now, it’s wholly possible that you’re going through your beauty stash and realizing you have six identical lipsticks from different brands, far too many highlighters, and a whole nail polish repertoire in the same color family. (Hey, you like what you like!) It’s a perfect excuse to try out a Skittles manicure, with three or more colors on each hand. Sure, it’s just a regular manicure, but using a rainbow of complementary shades gives the illusion of nail art. You can use any combination of colors you want, but the easiest way to end up with a manicure you don’t hate is picking shades that might be neighbors on the color wheel. For inspiration, check out nail artist Jessica Washick’s sea glass-inspired blues and greens, Betina Goldstein’s variations on blush, and polish brand Trou De Lapin’s taupey dream.
Cow Print

Photo courtesy @stephstonenails
When nail artist Steph Stone taught Miley Cyrus how to do a few nail art designs on Instagram Live the other day, it was the cow print that caught my eye the most. It feels timely yet classic, and simple enough that you won’t get sick of it—plus, it’s actually easy. (And not easy-if-you’re-good-at-nails easy. Easy easy.) To do it, all you’ll need is this podcast and opaque white nails as a base. Wait for that to dry before going in with your second color. You can copy Stone’s classic cow print or, if you don’t have a black polish readily available, use a brown or taupe or even an opaque pink. There’s no nail art brush necessary—just wipe the brush of your color of choice to control the amount of polish on it, and then make little, irregular splotches. There’s no need to be perfect or symmetrical, because cow splotches aren’t perfect or symmetrical. And the result is undeniably impressive.
Colorful Tips
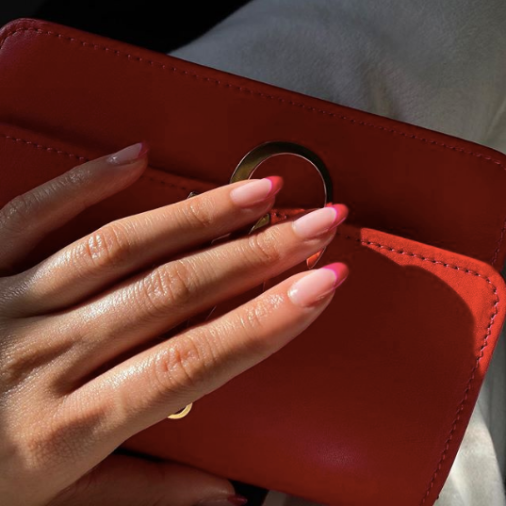
Photo courtesy @fongminliao
French tips: they're baaack. But now with bright colors, effectively turning an otherwise stuffy or tacky manicure into something that feels fresh. You can start with any base you want—a classic sheer pink works, and so does an opaque nude or neutral. Or, keep it clear! Then, using your color of choice (something with opacity works best here), clean the brush of any obvious globs and drag it horizontally along the edge of your nail. Some tips to help you achieve a clean line: instead of moving the brush, try keeping it steady and gently rotating your finger. The line looks smoother because it doesn’t rely on the steadiness of your hand—you can even anchor the finger you’re working on with your thumb or the pad of your palm for extra stability. Make sure the tips dry completely before adding a top coat, because you wouldn’t want streaks to ruin your hard work. And, also, it should be noted that this style looks best on long-ish nails that extend past the ends of your fingers. Once you master the basics, make as many looks as you have colors! You can even try combining it with the Skittles trend for tips that taste the rainbow.
Half Moons
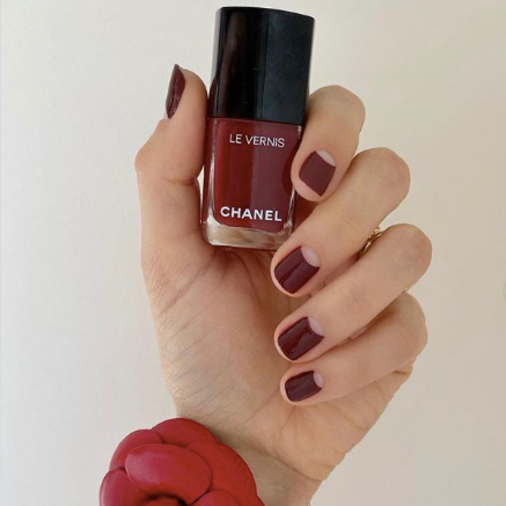
Photo courtesy @betina_goldstein
It’s your French manicure’s evil twin, the half moon! Instead of painting just the tip of your nail, you paint everything except just the bottom. You might actually have natural half moons at the base of your nails already—they’re called lunulas, and they range from being super prominent to barely visible. You can cheat them using paper hole reinforcing stickers, which are the easiest way to mask a semicircle shape at the base of the nail. Just stick them half on, half off of your nail, then paint like usual. You can use any color you want for the rest of the nail—this burgundy version is particularly pretty, and a sage green feels inspiring right now, too. And if you don’t want to leave the half moon bare, just paint your entire nail first, let it dry, and then follow the above instructions like normal. (It’s much easier to paint the negative space around the half moon than to paint them directly on with polish.) Try a base of a totally different bright shade for a color blocking effect.
Tie Dye Nails
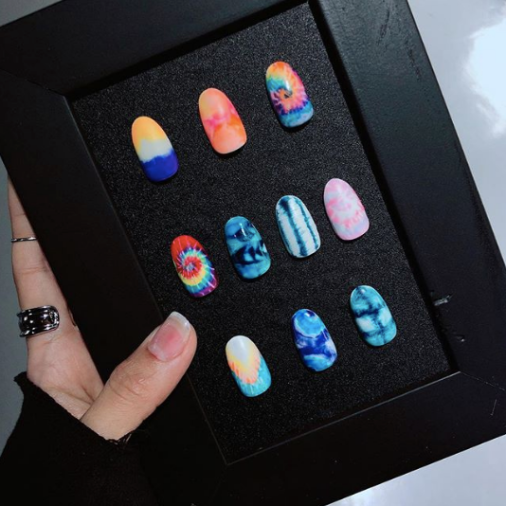
Photo courtesy @nail_unistella
When you’ve blown through all the above manicure ideas, clear an afternoon and attempt some tie dye nails. The joyful print exploded last summer, and we’re still feeling inspired by the bright colors and laissez-faire attitude of this classic DIY. To translate it to your tiny nail canvases, you won’t need a big bucket and some dye—but you will need a paper or plastic cup, a toothpick, and as many colors as you want in your design. Gel artists like Rose B. and Park Eunkyung can fake tie dye nails by swirling the polish around on the nail before they cure it, but you can get the look at home without a gel rig through water marbling. It’s kind of difficult to explain, so you should probably start by watching some YouTube tutorials. When you’re ready to start, cover your cuticles with scotch tape to minimize the mess, then get to dropping rings of color in your cup of water. When you’ve made your design, dunk each finger into the cup to transfer the print to the nail. You can use any colors you want, and as many as you want, but using clear polish for a few rings makes the look instantly chicer and more grown up.
—Ali Oshinsky
Main photo via ITG


