
Confession: makeup tutorial videos put me to sleep. Not because they’re boring! It’s just, somewhere between the swirling brushstrokes and the chill tunes, I end up dozing off. They’re basically ASMR. (Sometimes, they’re actually ASMR!) On nights when I'm just not tired, I hop onto my favorite social platform du jour and let a very talented makeup artist or two or 13 carry me off to sleep. It’s really the only thing that works. Alas, every now and then my plan backfires—I stumble upon a makeup tutorial too good, and my wired nighttime brain starts looping around how I can do it on myself immediately. And that’s exactly what happened when I started to notice butterfly eyeliner all over TikTok. Maybe I should just take melatonin? Here’s the one that really got me:
@jaritzza please don’t let this flop 😔😔 #foryoupage #foryou #fyp #mua #makeuptutorial #ThatsWhatILike #gymrush #HMmerchformation
♬ original sound - evintage
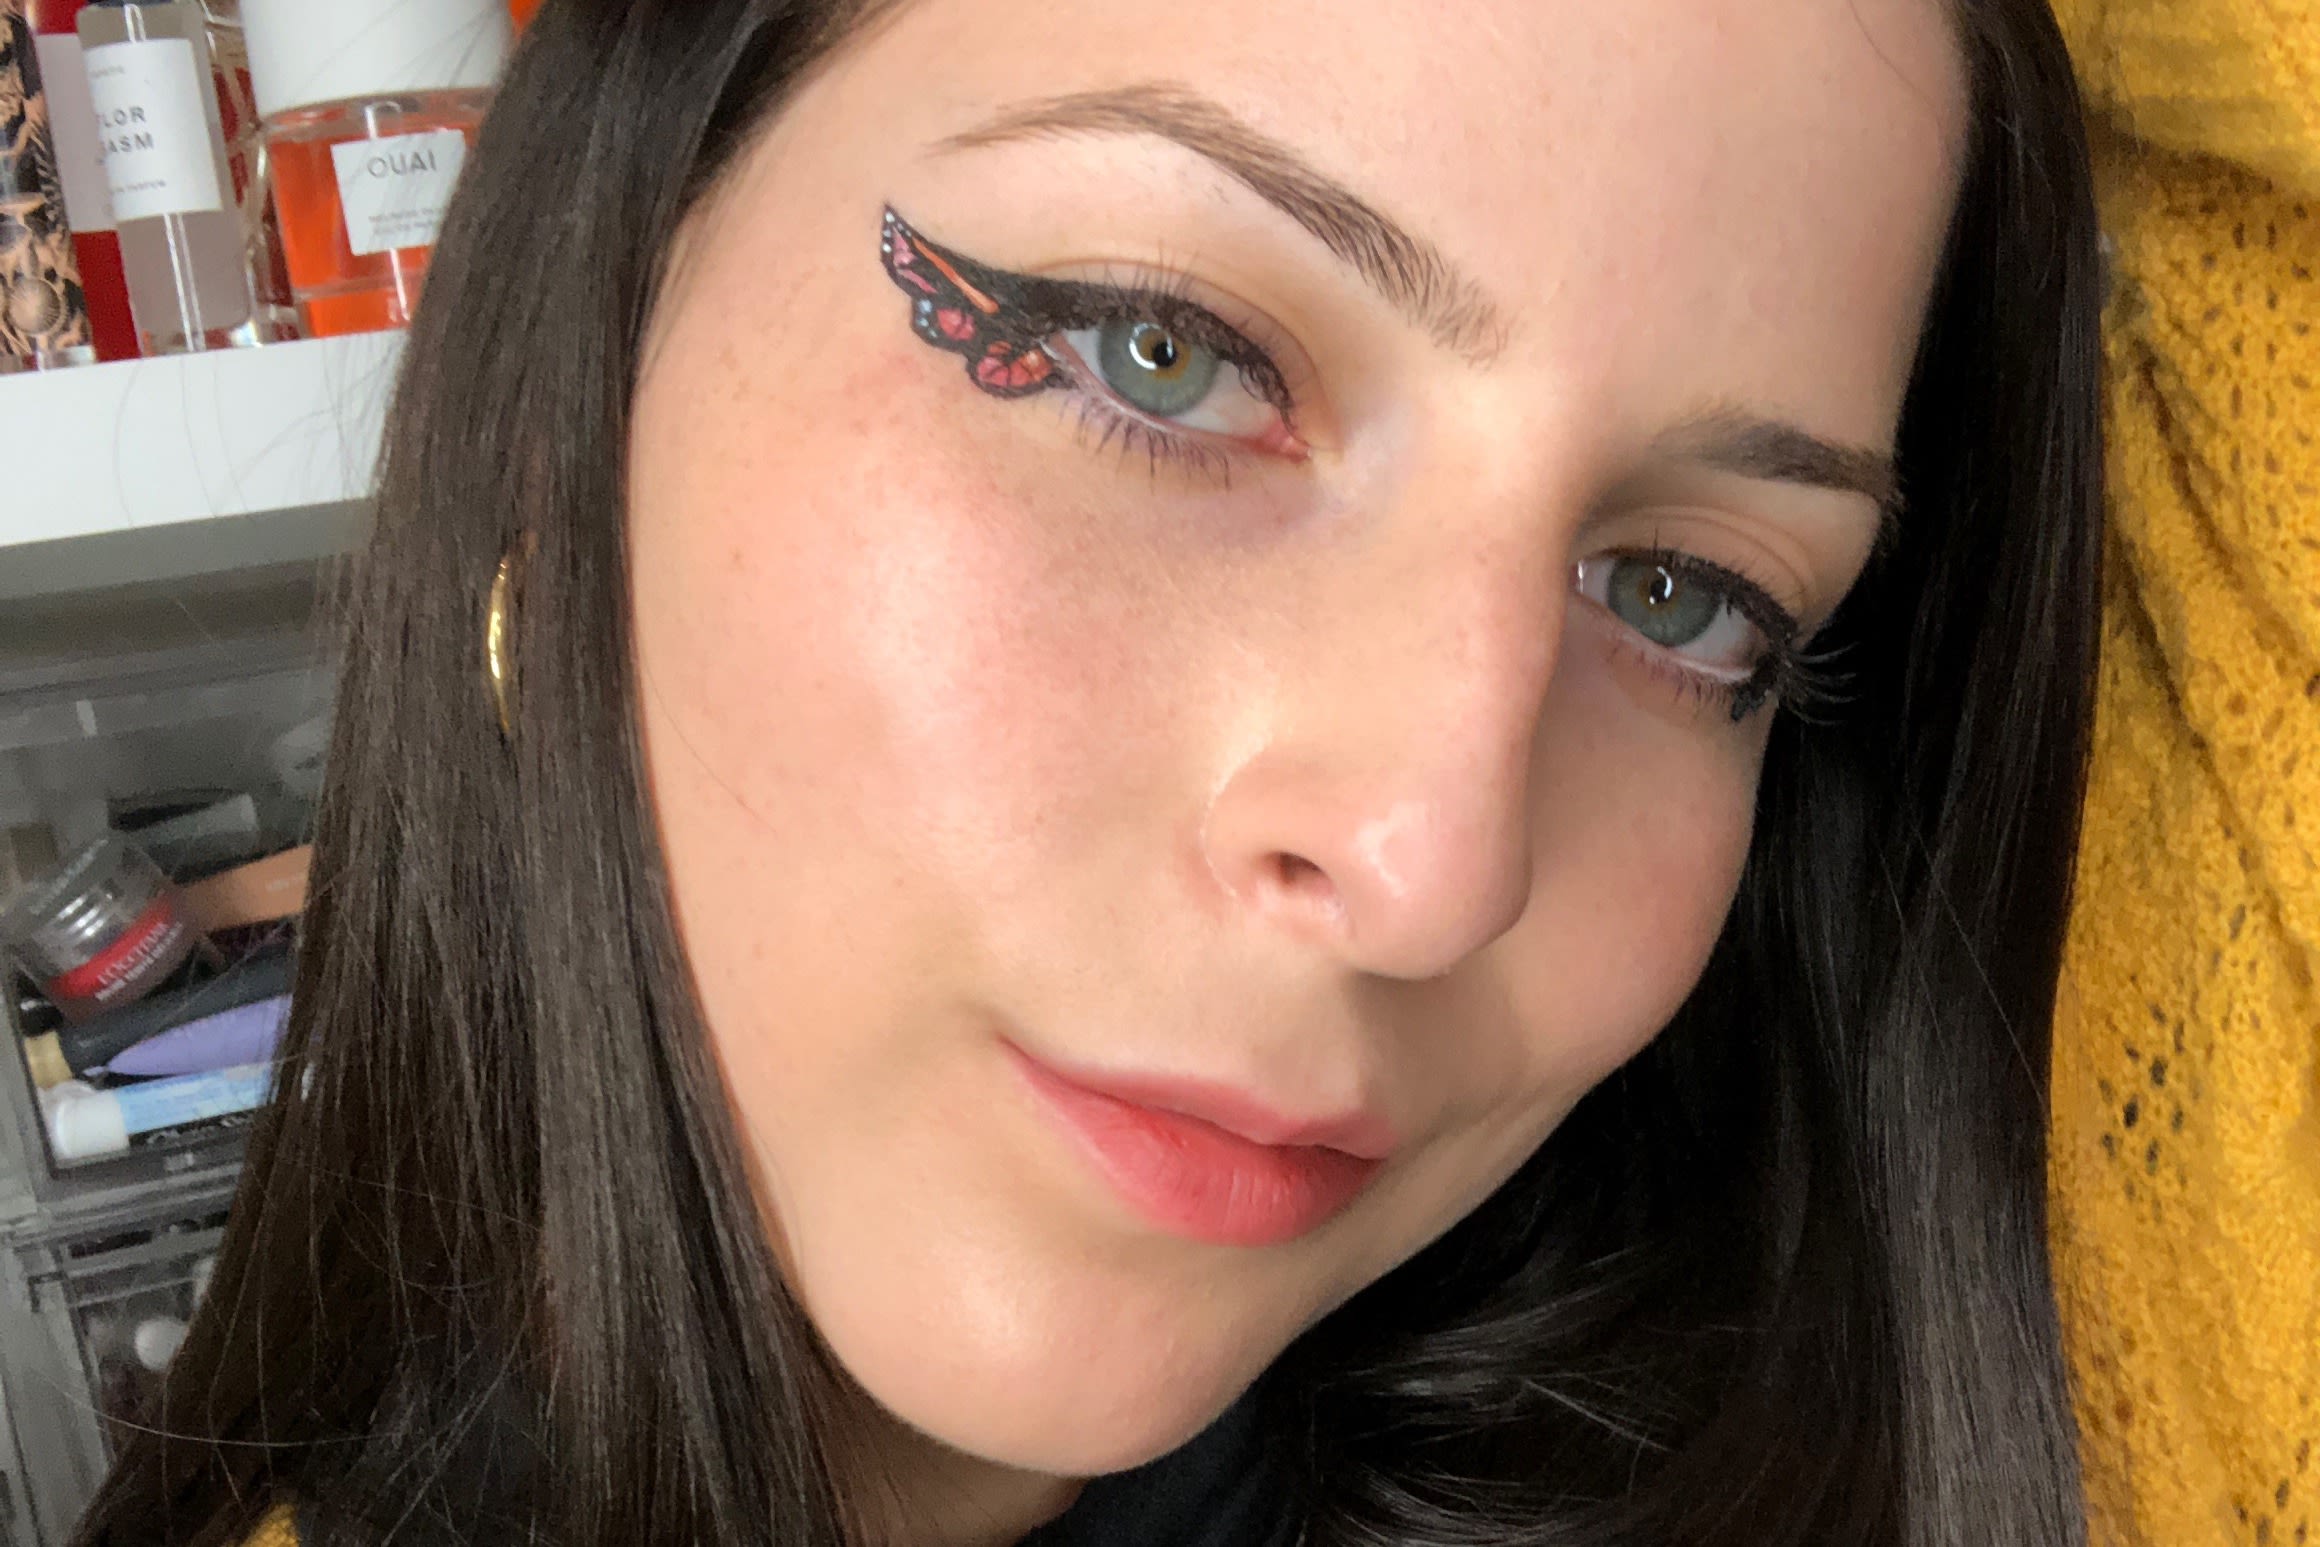
So pretty! So unexpected! So… fast? I watched it a million times trying to get it right. And then, I finally did. Be forewarned: it’s not easy. It’s certainly not for every day. But it does look impressive as heck—and all you’ll need are two eyeliners (a black and a white), a small brush, and some eyeshadow. If you want to try to get the look at home, this handy step-by-step breakdown is a good place to start.
Start with a flick
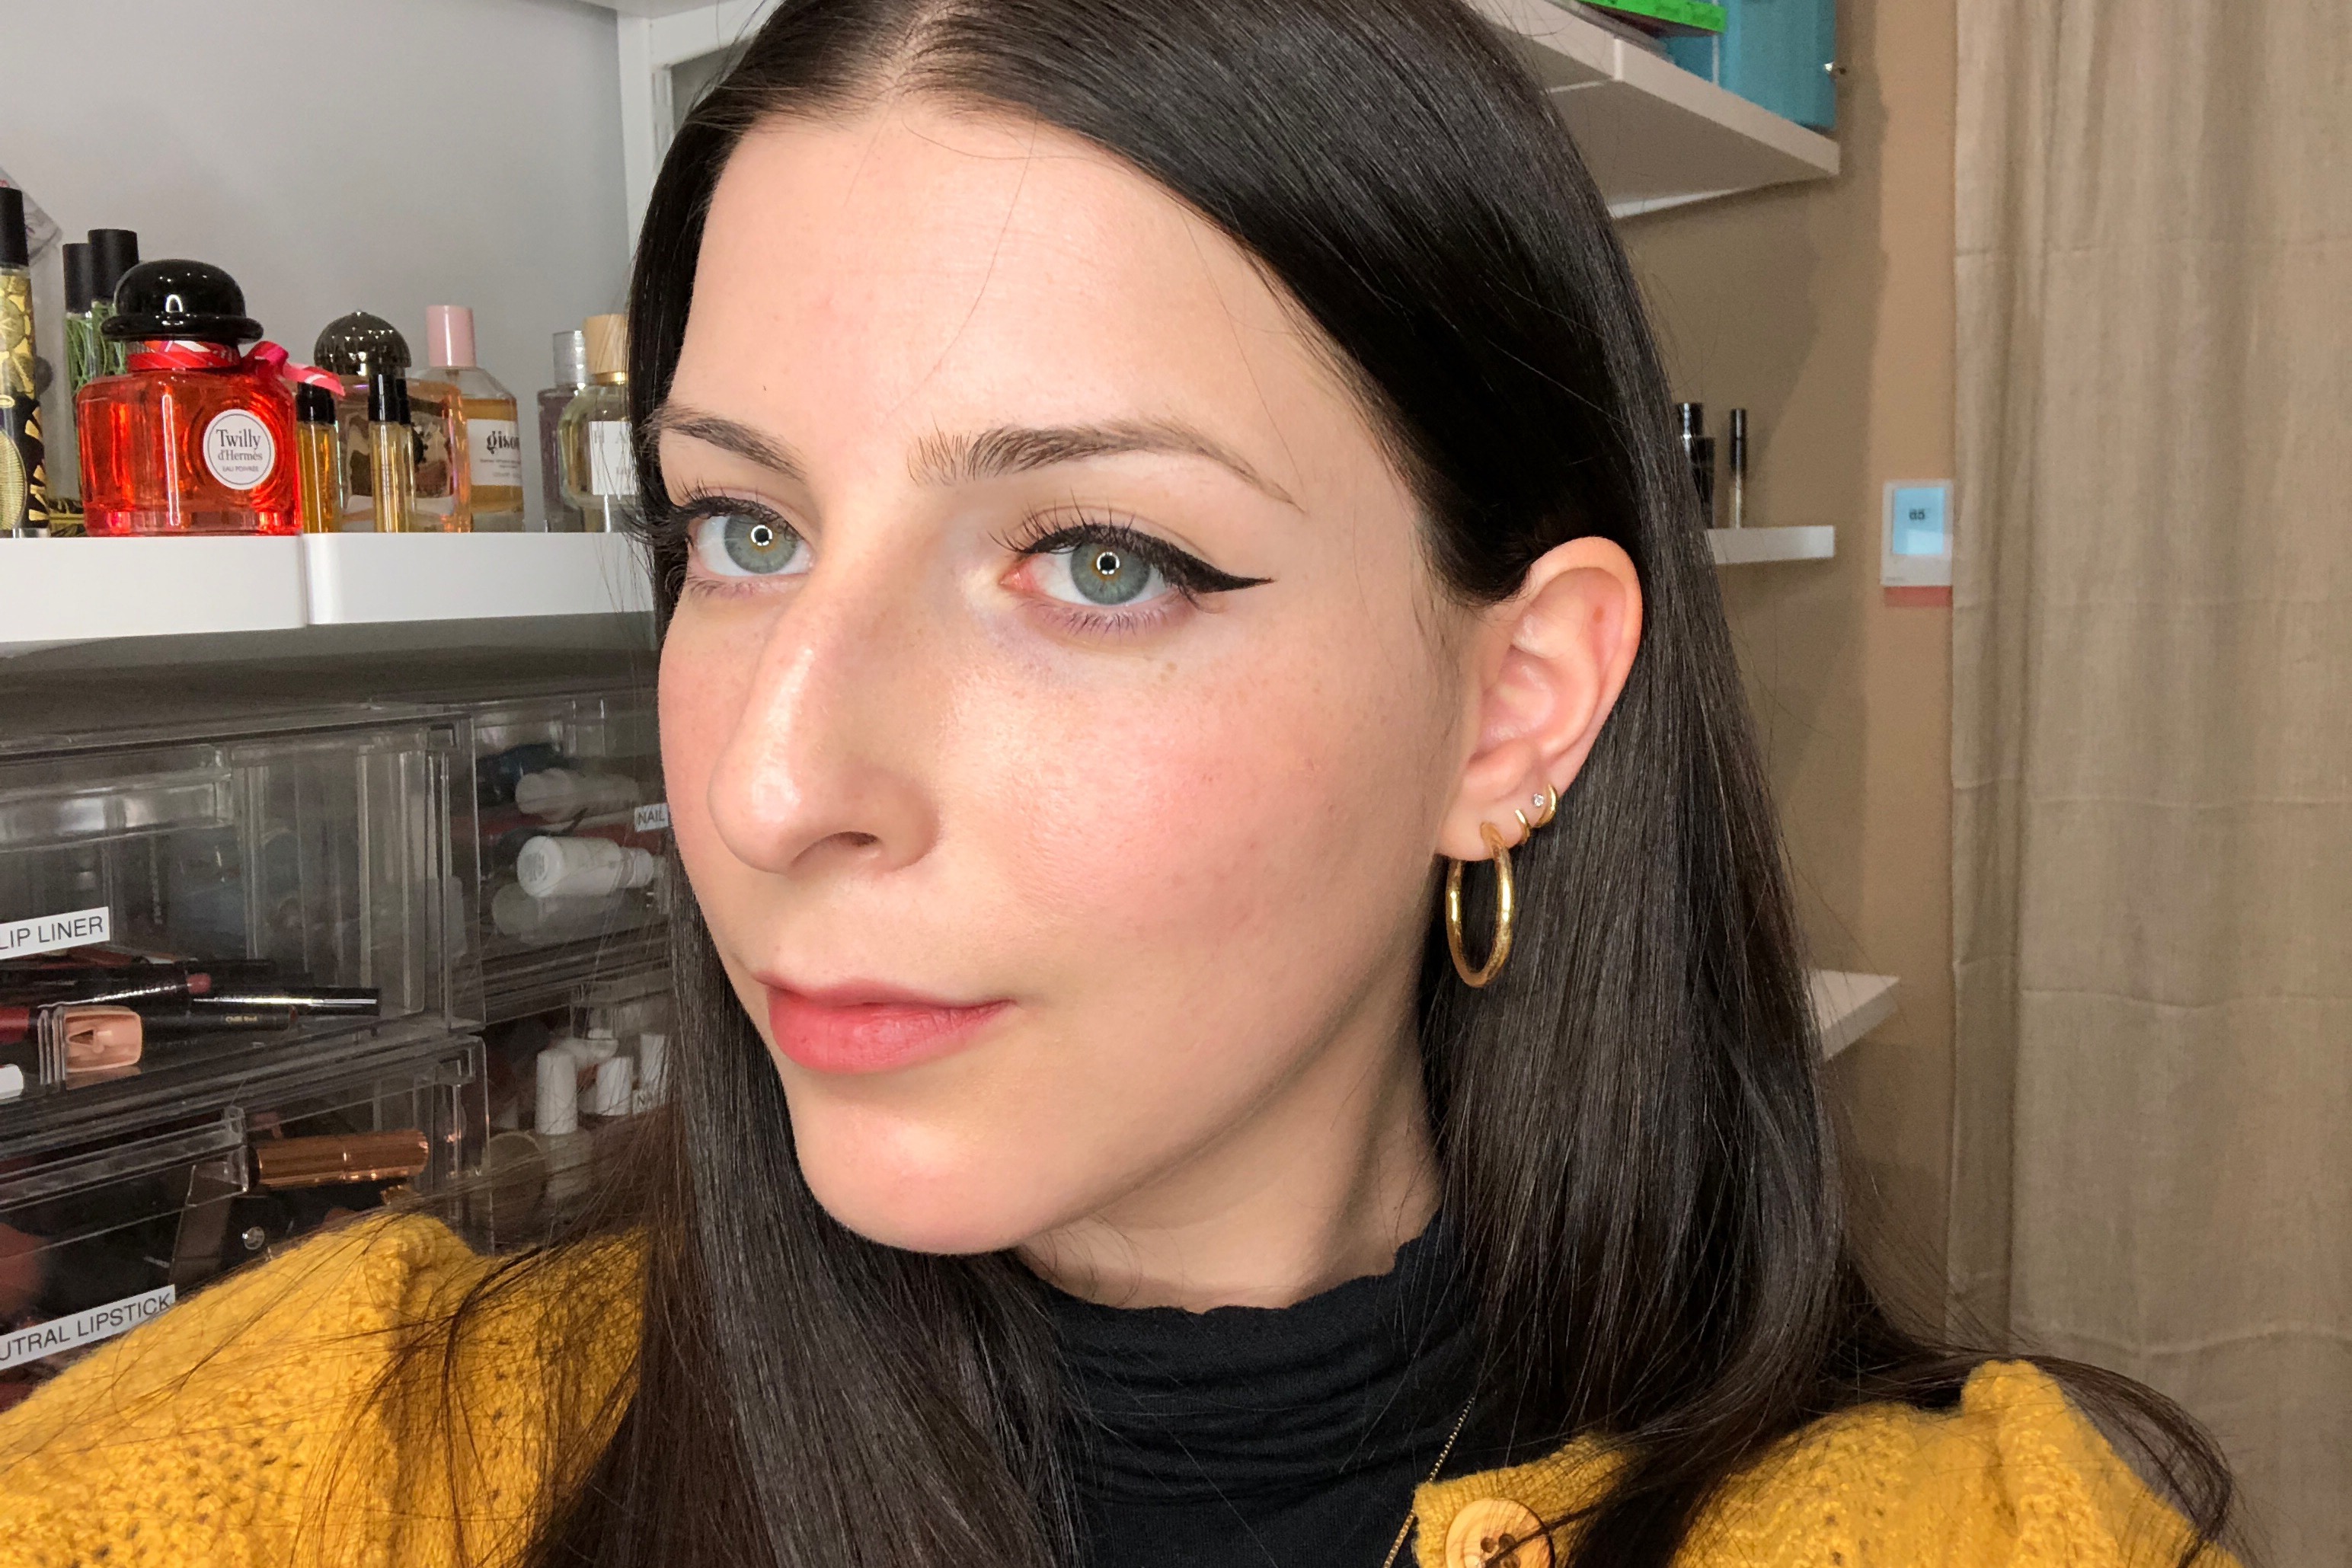
Create a winged liner, like you’d normally do. It helps to use a pen format liquid liner with a very, very fine point because you’re going to need it again later for detail work—I used Glossier Pro Tip, but Stila Micro Tip is another good option. Here’s a good video tutorial for just this step, if you’re still shaky on your basics.
Draw your wing
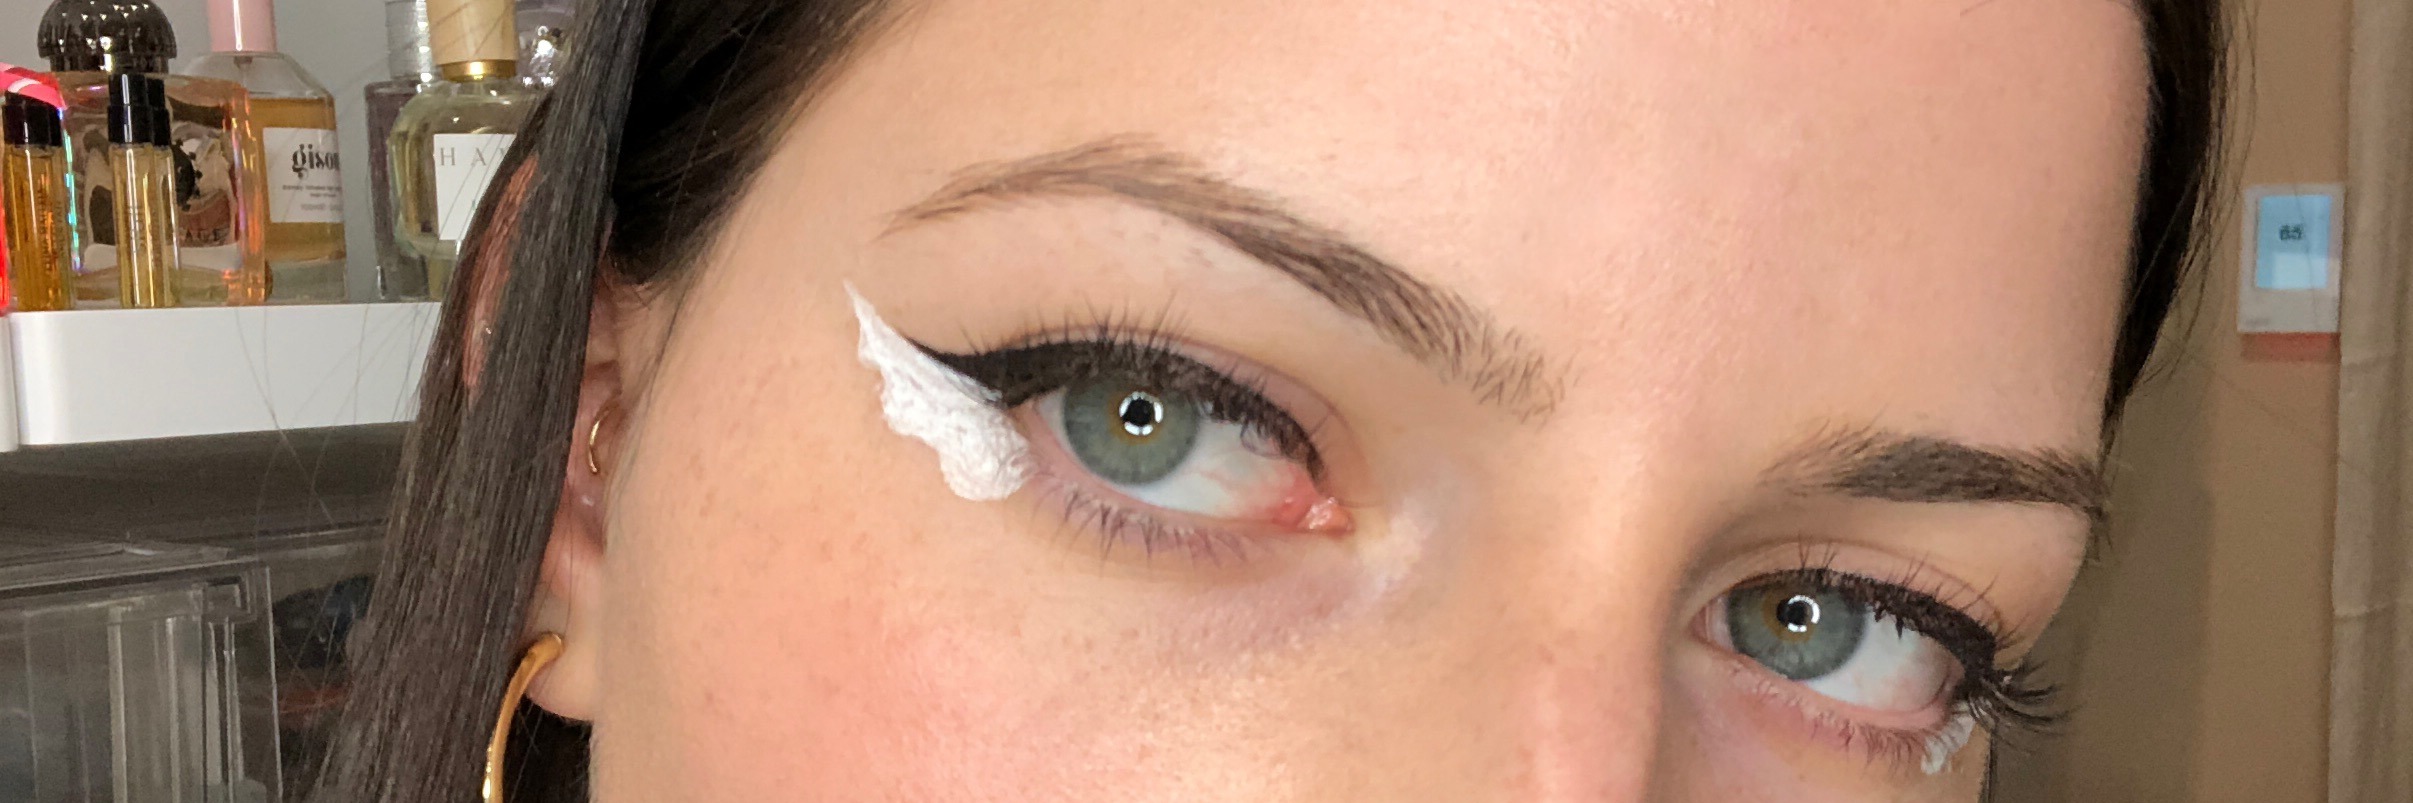
With a white liquid liner, outline the shape of your wing. Again, a pen formula is best for precision—I used Colourpop’s. This will make the colors you use on top brighter, and also give you a boundary so your wings come out even. Start from the outer corner of your eye and use the wing you just drew as a guide. Then, draw a teardrop shape down to about a third of your lower lash line. Fill in with white.
Put it in technicolor
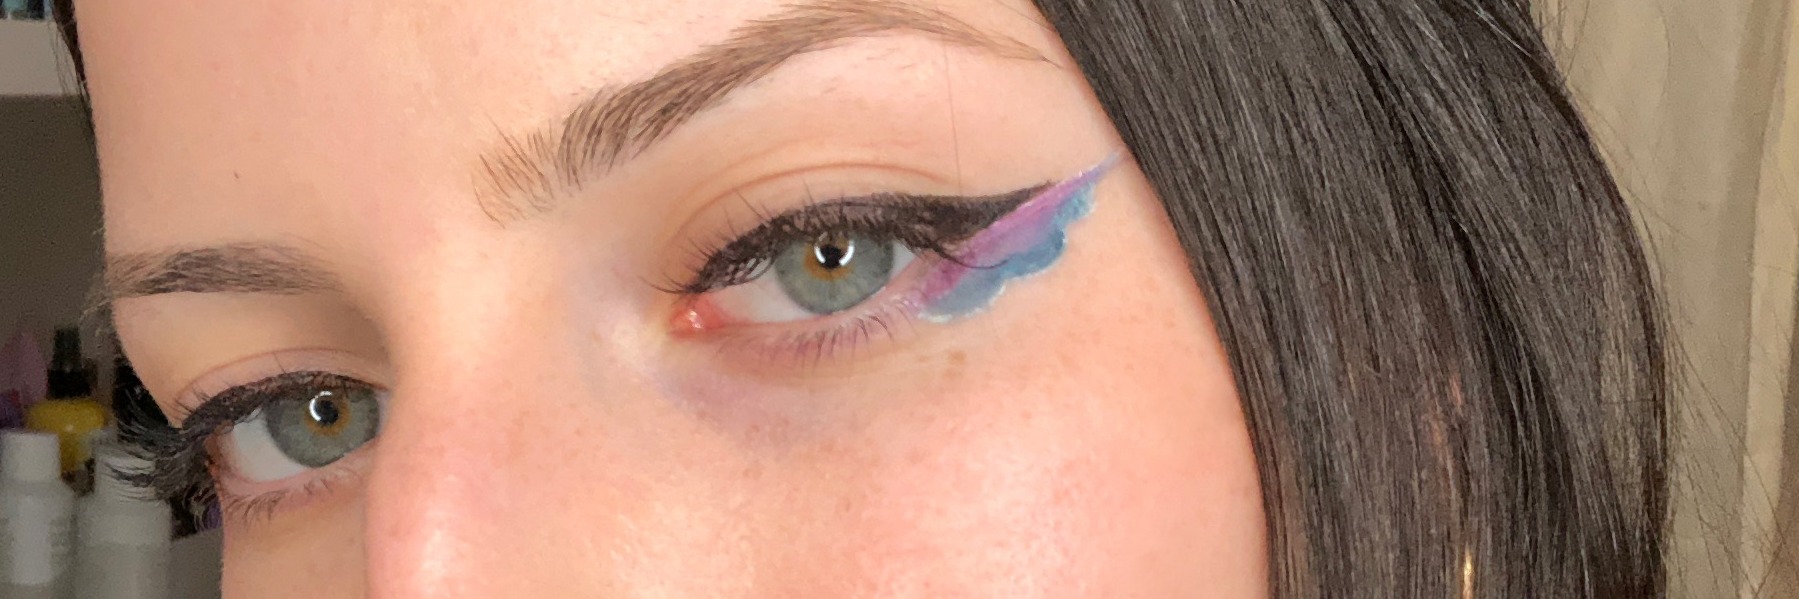
Using a super small brush (something like this Morphe brush is good, or you could even use a small paintbrush) add on your color. I used Marc Jacobs eyeshadows, but you can really get creative here. Use something you already have, but never use! Mix different colors on each eye! The brighter the shades, the better it will look.
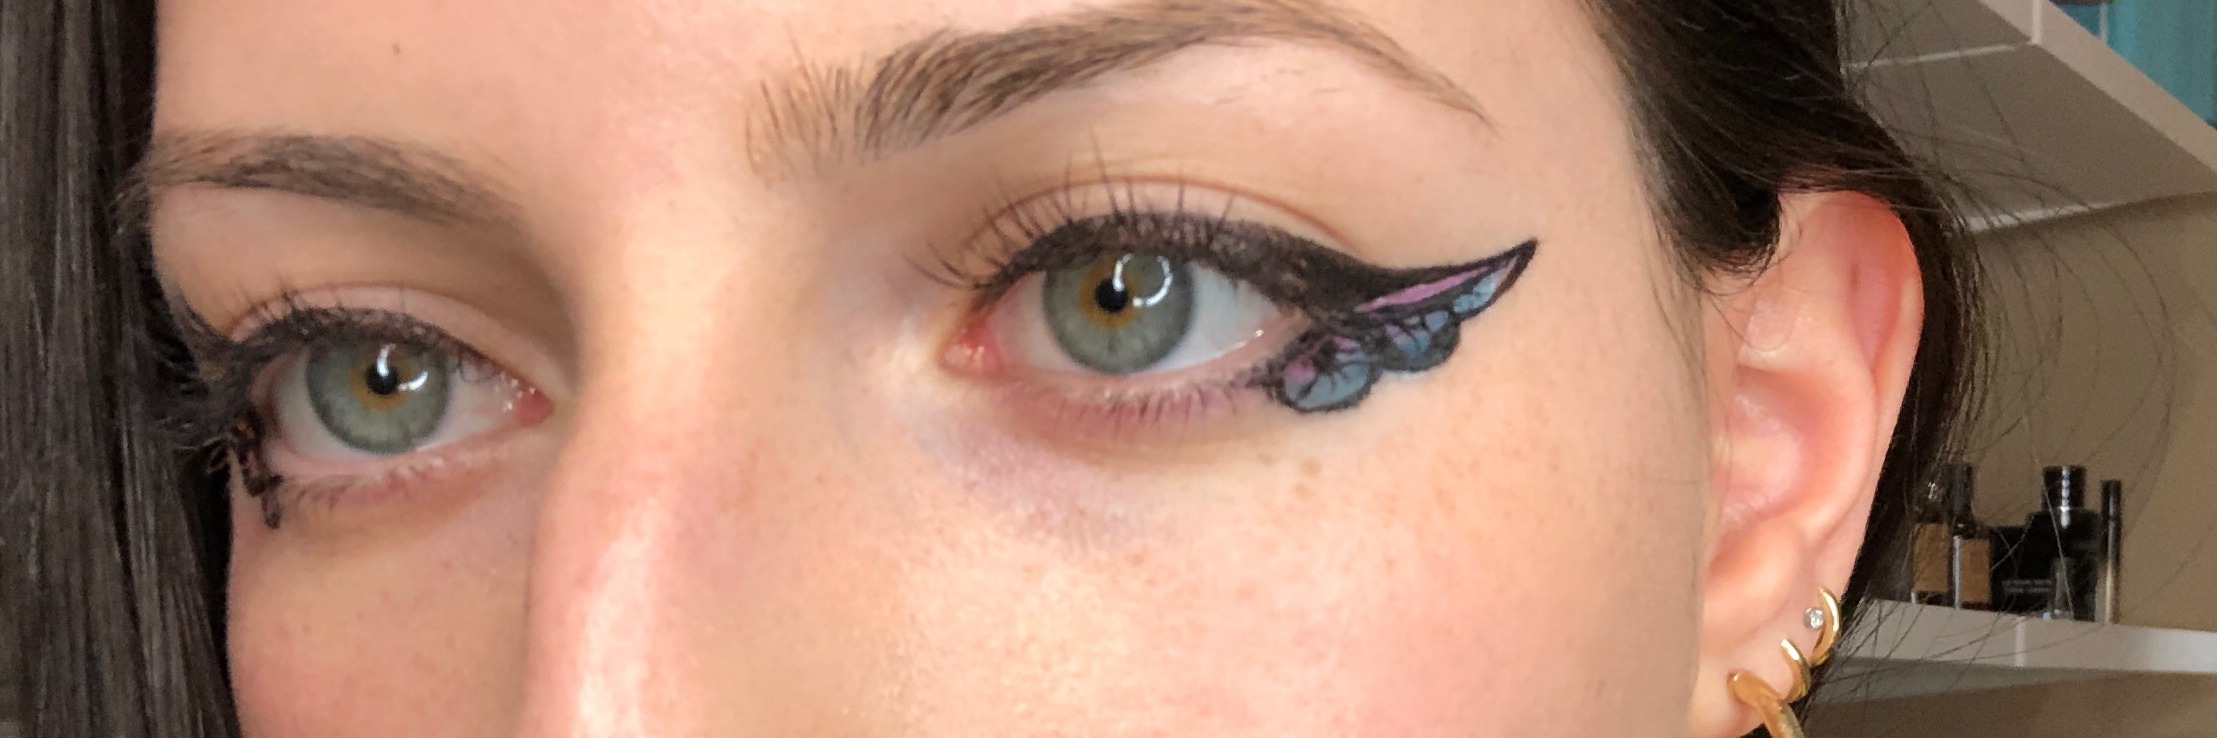
And add the details
Next, you’re going to go back in with your black eyeliner. This is when it’s important to use something with a fine tip! Outline the colored portion and connect it to your black wing, and then sketch out the details on the wing. A light hand is necessary here. Don’t worry if it’s not perfect—they’re organic shapes, so you won’t really be able to tell—but try and draw each stroke confidently. It’s easier to go slowly than to fix a line you didn’t like.
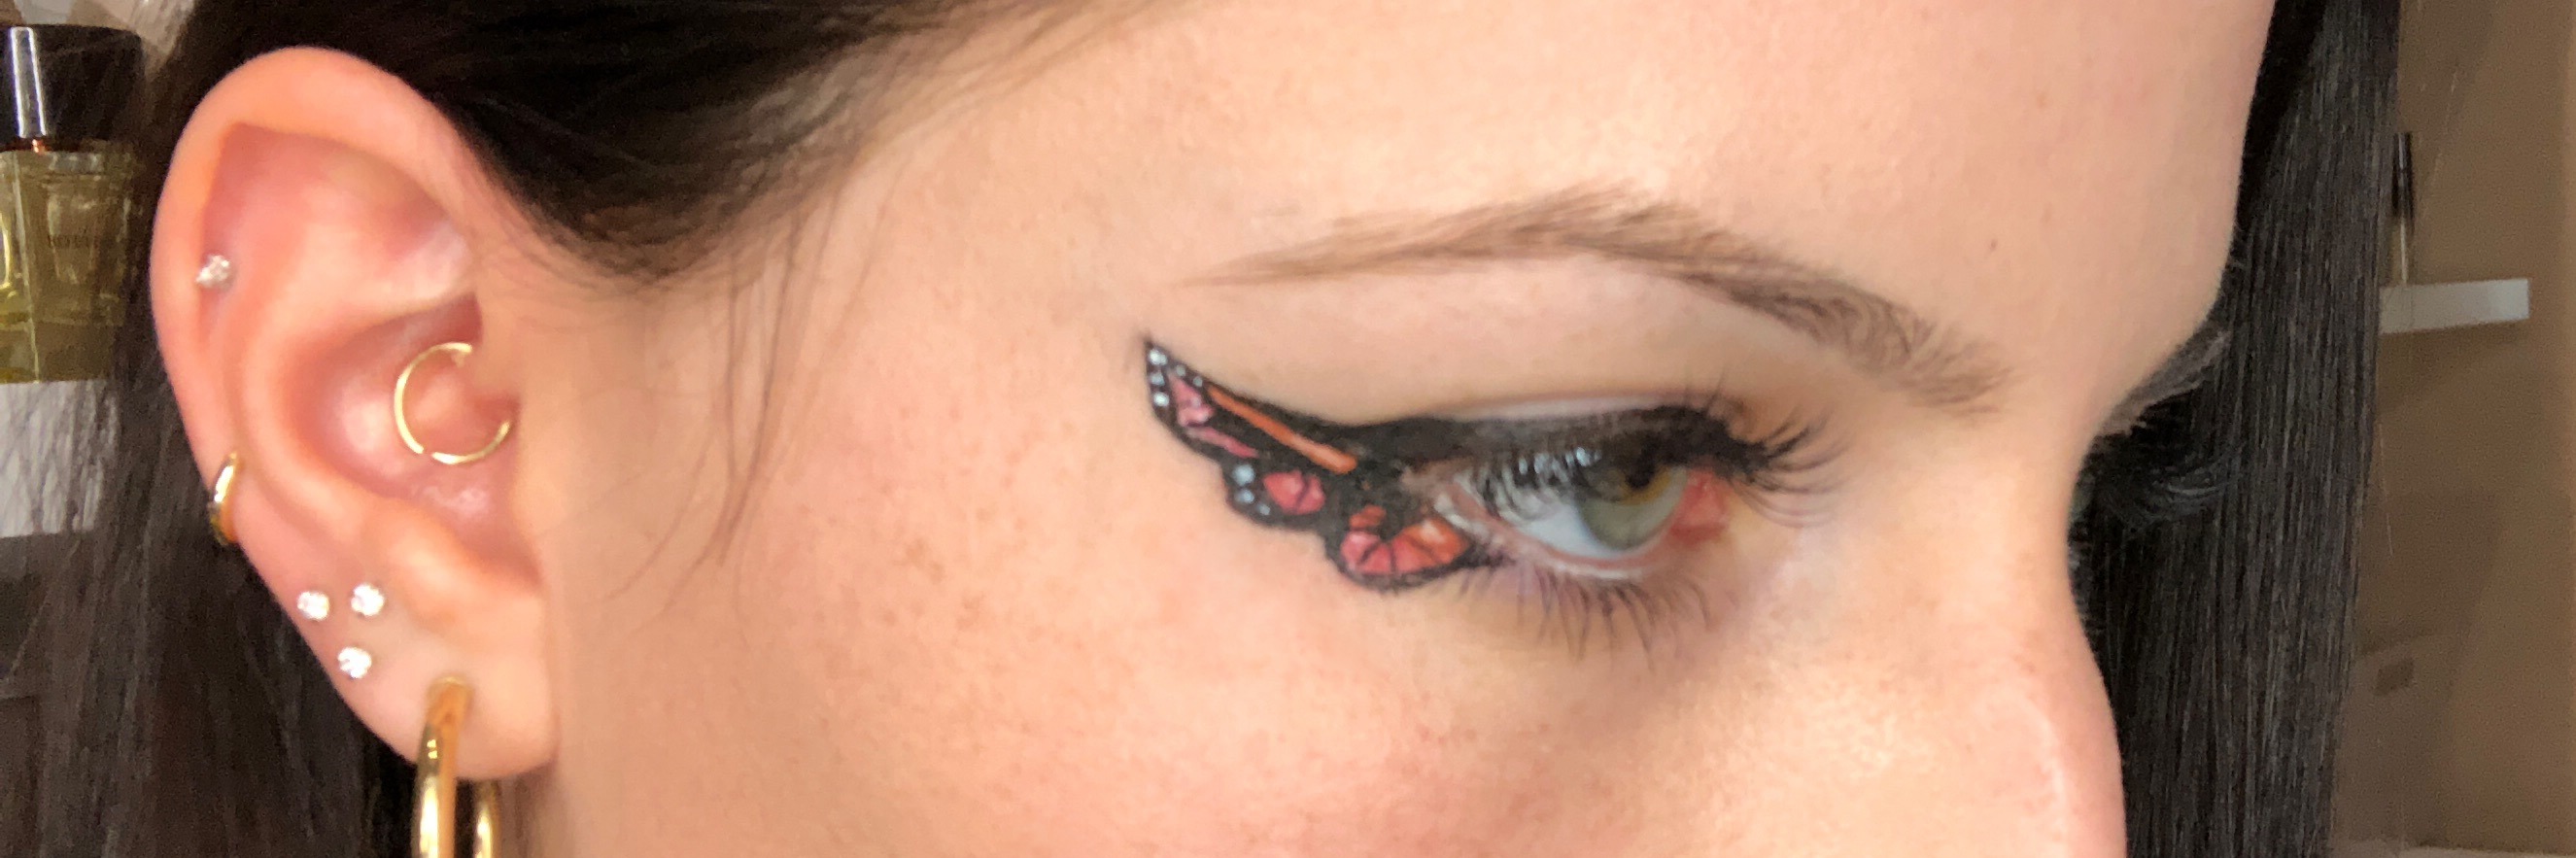
Then make the finishing touches
Finally, finish with a few details using your white liner. Some dots make the wing look realistic, and highlights of white brighten up where your color may have gotten muddled. You can line your inner waterline with it too, or leave it alone. That’s it! If you’ve made it this far, give yourself a pat on the back.
—Ali Oshinsky
Photos via the author