


A few months ago, I was at a hair salon, being blonded. During that sit-around-and-read- W-while-drinking-Keurig-coffee time that takes up most of the appointment, a woman approached me. She was tall and had this intense and studied manner about her, and she asked me how I got my lipstick to look the way it did. It took a moment for me to recall that I was even wearing lipstick– MAC Ruby Woo on top of MAC Prep + Prime Lip. It had already been through a teeth-brushing, a bag-tearing-open effort, a dry mouth (I was nervous about the 40-volume decision), and now my second Keurig brew. She responded that she also owned Ruby Woo (naturally) but couldn’t get hers to look like mine; that “a lot of women spend a lot of time to get their lipstick to look like mine.”
Well, that time would be wasted. Now, a tutorial on how to achieve what I refer to affectionately as “the Rough Lip':
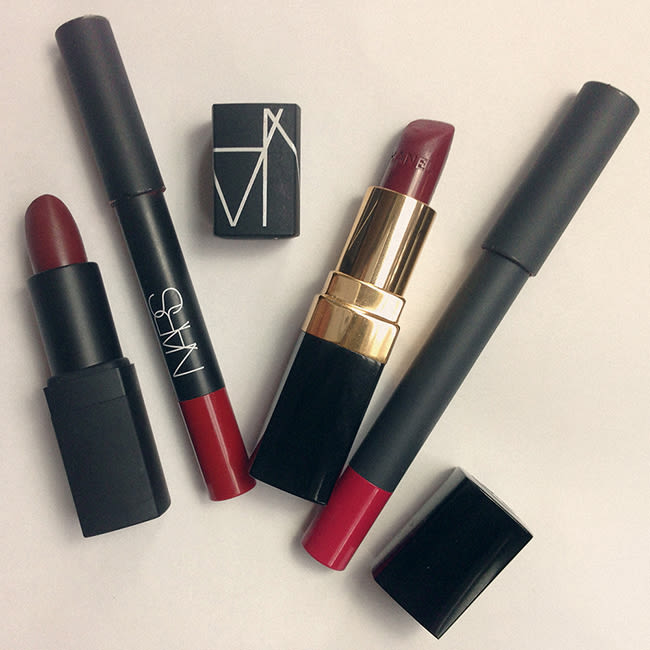
First, you’ll want to prime your lips—if not with Prep + Prime, then at least with some Lip Smacker (especially if it’s Strawberry-Banana Starburst). For color, apply your favorite matte red along the line where your lips meet, up the peaks of your upper lip and down the curve of your lower. Again, I refer you to Ruby Woo, which is great for deepening to red or smearing to pink—plus, it smells like frosting. Also consider Nars Lipstick in Fire Down Belowfor a great deep matte brick, without which no woman is complete.
With your ring finger, that helpful weakling, smear the color in the center of your lips out toward the edges. Use other parts of the hand to clean up, no cotton pads here. Distribute, but don't evenly apply, color—keep it perfectly imperfect. Now smack together, blot with a cotton pad, and set—no delicate tissue-gumming. The look is imprecise, casual, and lived-in. The distressed denim of lipstick. Part grunge, part '50s elegance—Hitchcock Heroin(e) Chic.
For a more advanced approach, consider a little layering. When I do a rough lip, I always add an accent color right in the center, for the sake of depth. Sometimes Nars Lip Pencil in Cruella (keeping it red), sometimes Bite Lip Pencil in Cranberry (taking it pink), sometimes Chanel Rouge Coco in Rivoli (steeping in wine).
This also allows for a little high/low lip play. Sure, you’ve got your investment statement lipsticks, but how boring is it to be limited to the Bloggers’ Specials? The same way you might dress up your prized Celine coat with Zeline everything else, hit your fancy lipstick with a soupçon of drugstore accent for experimenting on the cheap. Exempli gratia: I have Nars Jungle Red, but last season it seemed like everyone was raving about Heat Wave and J.Crew-style orange lips. So I bought a Wet N’ Wild (yes, I did) lipstick in a shade questionably described as Purty Persimmon and ran that color over Jungle Red, then smudged it with my finger until it blurred. After wearing this combination for a week, I decided I didn’t even need Heat Wave after all—lesson learned, money saved.
If you’re into a darker, Lorde lip, go for a gothy-popsicle look: Use any higher-end red with Wet N’ Wild Wild Cherry Picking, employing the technique above. Now you’re so chic it’s terrifying. It's your favorite lipstick, and, for two dollars, made completely new again—in a way that’s still thoroughly lived-in. Isn’t that having it all?
—Trace Barnhill
Photos by Trace Barnhill.